lunes, 5 de septiembre de 2011

Reindeer cookies


Ingredients
  • 1 package (16 oz) Chocolate CANDIQUIK Coating
  • 24 Peanut Butter-filled Sandwich Cookies (Nutter Butter)
  • 1 Bag Large Pretzel Twists
  • Jelly Beans or M&M Candies
  • White Candies or Decorative Icing
  • Melt Chocolate CANDIQUIK according to directions on package.

  • Break pretzels into pieces to resemble antlers; set aside.

  • Dip Nutter Butter cookies in melted CANDIQUIK; let excess run off and place on wax paper to set.

  • When cookies are almost set, but not completely dry, press pretzels pieces onto cookies to create antlers.

  • Cut a jelly bean in half or use an m&m candy for the nose.

  • To create the eyes use a white piece of candy or white decorative icing (or for colored eyes, simply use m&m’s). Use a toothpick dipped in CANDIQUIK to create the pupil.


  •    

    How to Make Fondant Ribbon Roses


    Fondant ribbon roses add a touch of whimsy to any cake that you make. They are so easy to make that you can probably make it with your eyes closed. I use them a lot on cakes for kids, babies, and even for wedding cakes.
    Here is a illustrated guide on how to make fondant ribbon roses. The tools that I used were a ruler and pizza cutter. I used a ruler as a guide when cutting the fondant with the pizza cutter. You can use a knife or metal spatula in place of the pizza cutter.

    METHOD Color the fondant to desired shade. Roll it to about 1/8" thick.
    fondant roses
    Using a pizza cutter and a ruler, cut a rectangular shape of approximately 3" by 7". You can cut them smaller or bigger depending on what size you will need. Once you cut the rectangle, fold it over lengthwise.
    fondant rose cake
    Then take one end and start rolling it to the other end. You can pinch the bottom part, like making some pleats, as you roll along. This helps open up the rose a bit.
    fondant

    fondant ribbon rose
    Once it's rolled all the way to the end, cut the excess part off.
    fondant rose
    Next for the leaves, cut the fondant into squares. What I do is roll out the fondant and cut a big square, then I cut smaller squares. This helps the production faster.
    fondant leaves
    Then take two opposite corners of the square and pinch them together in the middle.
    fondant rose leaves


    Cut the pinched part in the middle.
    And voila, you get two leaves at once!


    You can make them roses and leaves ahead of time and leave them to dry or you can place them on the cake right away.
    fondant roses cake

    Orejas de Elefante o Palmeras

    Cortesia del Sr. Bobby de Comerio, P.R.


    1 receta de masa de hojaldre (puedes usar la que viene preparada de Pepperidge Farms Puff Pastry)
    1 taza de azúcar granulada
    1 cucharadita de canela en polvo

    En la misma taza de medir, mezcla la taza de azúcar con la canela en polvo.. mezcle bien.
    Corte un pedazo rectangular de hojaldre, como de 18″ x 12″.. luego, sobre una mesa de trabajar.. riegas como media taza de la mezcla de azúcar y le colocas la masa de hojaldre encima.

    Luego de colocar la masa sobre el azúcar.. le riegas mas azúcar por encima, regándolo hasta las orillas.

    Comenzando desde el lado angosto, comienze a enrollar la masa hacia el centro. Luego hace lo mismo desde el otro lado angosto.. hasta llegar al centro de la masa.


    Ahora tomas un cuchillo bien filoso y cortas las galletas como de 1/2″ de espesor; colocándolas sobre una placa de hornear que tenga papel de cocinar en el fondo.. o una lona de tipo Silpat (como en la foto). Estas galletas crecen y se deben colocar con mas de 1″ de espacio entre cada galleta.

    Cocine en el horno pre-calentado a 400°F por 12 a 14 minutos. El azúcar se va a caramelizar y las orejas estarán bastante doradas. Las retiras enseguida de la placa de hornear y las colocas sobre una parrilla de alambre a enfriarse.

    How to Writing on Cakes

    by Susan Matusiak
    Writing on cakes is perhaps one of the most difficult tasks to do. A beautiful cake can almost be ruined by sloppy writing. Some people have lovely penmanship on paper, but writing on cakes is totally different…..you need lots of practice.
    Piping Message on CakeWriting on buttercream cakes is a bit easier if your buttercream crusts over or if you could chill your cake in the refrigerator. This will help set up your icing. Practice your message on cardboard or parchment paper the same size as your cake, marking where to place the message. You can pipe in buttercream, royal icing or piping gel. When piping your message on a cake, mark a straight line to guide you using uncooked spaghetti or dental floss lightly pressing into the icing and then remove and write your message.
    Another method to help you place the message on your cake is the Piping Gel Transfer. This is used for many patterns and can also be used for messages. Write or print your message on parchment paper, tape the paper with the message side down on a cookie sheet (message will be backwards). Pipe the message using decorating tip 1 with clear piping gel. Remove the parchment paper from the cookie sheet and turn the parchment over (piping gel side down) and place on your cake. Using a brush, gently trace over the gel lines. When completed, carefully lift the parchment paper straight up. Gel message will be transferred to the cake. Now you can overpipe your message in icing.
    Another idea would be to use buttercream instead of piping gel as a transfer for your message. Pipe tip 1 in the same color buttercream as your frosting and follow the instructions as above to complete the transfer.
    If you feel a little uncomfortable using buttercream to pipe your message, here are a few other ideas that allow you to have more control of the placement of your message.Using Alphabet Molds
    • Fill the alphabet candy molds with melted candy, let set in refrigerator and then remove them from the molds and place on your cake. You can also use rolled fondant in the candy molds, just dust the molds with cornstarch and then press the fondant into the molds and release.
    • Use rolled fondant and cut your message using alphabet cookie cutters.
    • Use tinted royal icing and pipe your message with a round or star tip on waxed paper and let dry (overnight) and then carefully remove and place on your cake.
    • Using FoodWriters™
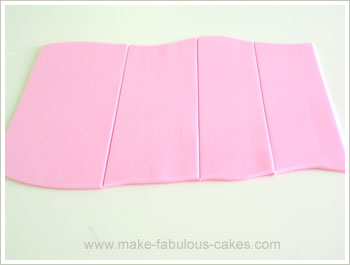
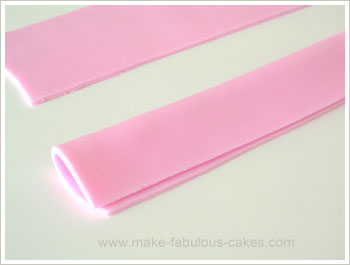
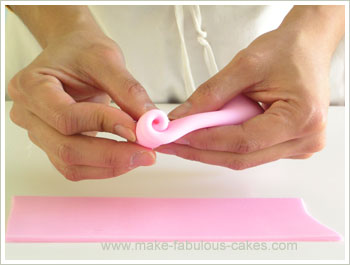
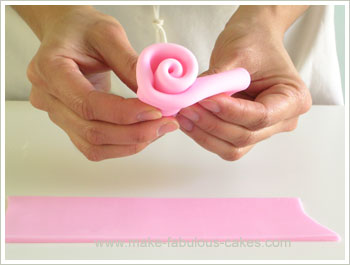
Make a fondant or gum paste plaque or banner, let dry overnight, then write your message with icing or a fine tip FoodWriter™. Place plaque on your cake with mini marshmallows or sugar cubes supporting the plaque below.
    • Try using FoodWriters™ to write on fondant, color flow or royal iced cookies, fondant plaques or color flow plaques.
    My handwriting on paper is very nice but it’s not so good on cakes. I’m all for anything that makes my life easier so I make my messages with rolled fondant and cookie cutters on almost all of my cakes…..it saves me a lot of time and looks great!

    How to Make Red Icing Red

    by Mary Gavenda
    Do you ever have any problems getting red icing red? I know I do. It can happen for a couple of reasons: didn’t add enough icing color or used shortening with a high yellow dye content, such as butter flavored shortening. Do you have a lot of minerals in your water that could make a difference (like well water)?Red Icing
    In the Wilton Decorating Room, we get the best results for a brighter red color using a combination of Red-Red Icing Color with Christmas Red Icing Color, equal parts. It will take a large amount of the icing color to achieve a deep red shade. Just keep adding more and mixing it in after each addition. Depending on the amount of icing you need to tint, you might start by adding 1/2 teaspoon of each for one cup of icing. You will also get good results when using No Taste Red Icing Color; you’ll still need to put in approximately 1 teaspoon of color to 1 cup of buttercream. No Taste Red Icing Color is muted a bit in color, but the taste of the No Taste Red is more acceptable.
    If it’s at all possible to plan ahead, make your icing a day or two ahead – or even three days! The color will deepen as it sets (but it does need to be a red color to start, not pink!)
    Keep in mind when you use a large amount of icing color, sometimes the buttercream icing taste becomes a little bitter. If this happens, add a little more flavoring to compensate for the difference. The amount of flavoring to add will depend on the number of cups of icing and your taste preference. Maybe an additional 1/4 teaspoon will help for each cup of icing. But the best judge will be your own taste, so adjust as needed. You can use Clear Vanilla or No-Color Almond Extract to increase the flavor. These extracts are clear so they won’t change the tint of your icing.
    A tube of Red Ready-To-Use Icing Tube (4.25 oz) comes in handy when I need a small amount of red, especially for a facial feature or maybe some red trims. (Keep your eyes open for a large container of our red buttercream icing, sold in a 4.5 pounds, available at Wal-Mart.)
    If you are using a lot of red icing on an adult cake or special occasion cake, keep in mind that anyone who eats it will wear some red tint on their teeth for the evening! If it’s a formal occasion, you might want to limit the use of large amounts of dark colors if possible.
    If you have any leftover red icing, you can save it for a future use. Just put it in a container or a double self-closing bag and freeze it for future use…like for Valentine’s Day when we do special treats for those we care about!

    Donas de azucar


    2 sobres de levadura instantanea o Rapid Rise
    1/4 taza de agua tibia
    1 1/2 tazas de leche, tibia, 120°F
    1/2 taza de azúcar
    1 cucharadita de sal
    2 huevos a temperatura
    1/3 taza de manteca vegetal
    5 tazas de harina de trigo (un-bleached all-purpose flour)
    aceite abundante para freir

    En el envase de la mezcladora echas 2 tazas de harina, la levadura, sal, azúcar, y lo mezclas por 1 minuto, a velocidad baja.
    Agregas el agua, leche, manteca vegetal y huevos.. y los bates por 2 minutos, para que quede bien incorporado. Agrega el resto de la harina, 1/2 taza a la vez, hasta que la masa esté bastante pesada. Cambia el batidor de la maquina por el gancho de amasar, y lo mezclas por 10 minutos, a velocidad 6. (Si no tiene maquina pesada.. lo puede amasar a mano.. por 10 minutos)

    Ponga la masa en un envase grande, engrasado con Pam (spray de aceite) y lo tapas con un paño limpio. Dejas la masa fermentar por 2o minutos, a temperatura y en un lugar que no circule el aire.


    Espolvoreas la mesa de trabajar con harina de trigo y colocas la masa sobre la mesa. Cuidadosamente reduces la masa a 1/2 pulgada de gruesa con el rodillo y usando un cortador de donas.. cortas las donas.


    Luego las colocas sobre una placa de hornear y las dejas fermentar de nuevo, destapados, por 1 hora o hasta que estén dobles de tamaño.

    En una olla grande, calientas el aceite ( no menos de 3″ de aceite) hasta que la temperatura llegue a 350° F (175° C). Usando un espátula, deslisas las donas en el aceite caliente (como 3 o 4 a la vez) y los voltéas (una sola vez) cuando estén doradas.
    NOTA: El aceite va a tardar en llegar a temperature y si no usas un termómetro de hacer dulce; vas a echar las donas a freír con aceite frio.. y esto va a causar que absorban demasiado aceite. Si se le calienta demasiado el aceite.. las donas van a estar doradas por fuera y crudas en el centro. Usar un termómetro es bien importante.

    En una bandeja de hornear.. cubres el fondo con capas de papel toalla y le vas colocando las donas cocidas encima para absorba el aceite. Mientras aún estén calientes.. echa en una bolsa de papel, como 1/4 taza de azúcar y 2 o 3 donas.. Sierras la bolsa y lo agitas para que las donas queden bien cubiertas de azúcar..
    *** Si deseas.. en la bosla que contiene azúcar.. tambien puedes agregar una cucharadita de canela en polvo. Las donas se pueden cubrir con ganache de chocolate.

    NOTA IMPORTANTE: Esta receta fué adaptada para usar levadura instantánea o Rapid Rise. Si va a usar levadura fresca o seca (dry active yeast).. entonces tienes que ajustar el método de preparación:
    • El agua y leche tibia no puede estar a más de 115°F.
    • La levadura se debe activar en el agua tibia antes de agregarlo a la mezcla, por 5 minutos.
    • La primera fermentación es de 1 hora, y la segunda de 1 hora o hasta que las donas doblen de tamaño.

    domingo, 4 de septiembre de 2011

    Arroz con gandules Orlando

    Ingredientes
    2 cdas de aceite
    1 libra de carne molida de res o cerdo (vea nota)
    1/8 taza de recaito
    2 tazas de agua
    1/2 cdta de sal
    1/4 cdta de pimienta negra molida
    1 sobrecito de sazon con culantro y achiote
    2 tazas de arroz grano mediano


    Procedimiento
    1.En un caldero agregue el aceite y cuando caliente agregue la carne.
    2.Cocine durante unos minutos y agregue el recaito.
    3.Agregue el agua con la sal, pimienta y el sazon. Mezcle y cocine hasta hervir.
    4.Cuando hierva agregue el arroz y mezcle. Cocine en temperatura mediana alta hasta que el liquido haya evaporado.
    5.Cuando el liquido haya evaporado, reduzca el nivel de calor y cocine hasta tener el grano tierno.


    Notas:
    1.Prepare un picadillo con la carne molida a su gusto. No le agregue aceitunas ni pasas.